Module 5
1. Module 5
1.2. Page 2
Module 5: Angles
Get Started
To move further through this lesson and module, you will need to be able to measure and draw angles. In this part of the lesson you will review the parts of an angle and check how to sketch and measure angles using a protractor.
 Try This
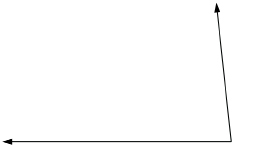
The common endpoint of the arms of the angle is the vertex of the angle.
Work with a partner, if possible.
In previous math courses you drew and measured angles of various sizes.
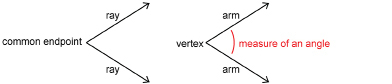
The measure of an angle is commonly given in degrees. There are 360 degrees in one rotation. Use the animation “Angle” to see all the angles possible in one 360-degree rotation.
Try This
Did You Know?
The peoples of the Middle East and ancient India divided the circle into 360 parts. This was, in part, because there are approximately 360 days in a year and the stars move in the sky in a great circle that takes a year to complete. Also, 360 is much more convenient to use than 365. Besides 1 and 360, the number 360 can be divided evenly by 2, 3, 4, 5, 6, 8, 9, 10, 12, 15, 18, 20, 24, 30, 36, 40, 45, 60, 72, 90, 120, and 180. Arithmetic is just simpler using 360.
Work with a partner, if possible.
You will need your protractor and a straight edge.
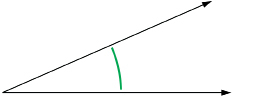
First review how to use your protractor. You will see two scales. The green or upper scale is for angles oriented to the right like the following graphic.
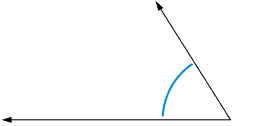
The blue or lower scale is for angles oriented to the left like the following graphic.
Use the applet “eProtractor” to practise making angles. Watch the angle measurements changing as you drag the coloured dot.
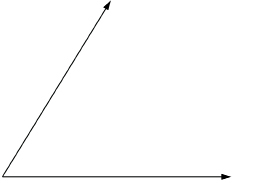
TT 1. You and your partner should measure each of the following four angles separately, and then check each other’s work for accuracy. Record all measurements to the nearest degree.

TT 2. Draw each angle from the measurements that follow. Draw the angles in parts a and b opening to the right, as in TT 1.a. and b. Draw the angles in parts c and d opening to the left, as in TT 1.c. and d. Save your diagrams.
Hint: You may find the “eProtractor” helpful. You viewed this applet earlier in the lesson.
- 49°
- 149°
- 16°
- 127°
 Share
Share
Once you have completed the activities in Get Started, discuss your answers with your partner, or collaborate by electronic messaging with at least two other Mathematics 10-3 students.
Discuss how some people can have different angle measurements when they are using the same tools. Identify some reasons why this might happen.
Save a summary of your discussion in your course folder.