Lesson 1
| Site: | MoodleHUB.ca 🍁 |
| Course: | Math 30-3 SS |
| Book: | Lesson 1 |
| Printed by: | Guest user |
| Date: | Monday, 3 November 2025, 3:10 AM |
Description
Created by IMSreader
1. Lesson 1
Module 6: Measurement
Lesson 1: Accuracy and Precision
Focus
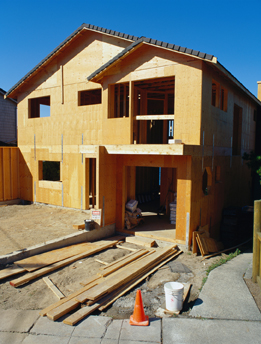
Ryan McVay/Photodisc/Thinkstock
When building a house, many people think of building their dream home. There are many costs associated with building a home, which are often dependent on the size, location, and design. Careful planning and effective use of materials must also be considered in the overall expenses. Careless mistakes in planning and measuring not only fill up the landfill with construction waste, but they create additional costs in both time and money—turning your dream home into a money pit. To avoid such costs, accurate measurements and precise measuring instruments must be used when building a house.
In this lesson you will explore the accuracy of measurements and the precision of measuring devices.
Lesson Outcomes
At the end of this lesson you will be able to
- explain why a certain degree of precision and accuracy is required
- explain the difference between precision and accuracy
Lesson Questions
You will investigate the following questions:
- Why is accuracy important in a measurement?
- How does precision play a role in the accuracy of a measurement?
Assessment
Your assessment may be based on a combination of the following tasks:
- completion of the Lesson 1 Assignment (Download the Lesson 1 Assignment and save it in your course folder now.)
- course folder submissions from Try This and Share activities
- additions to Glossary Terms
- work under Project Connection
Self-Check activities are for your own use. You can compare your answers to suggested answers to see if you are on track. If you have difficulty with concepts or calculations, contact your teacher.
Remember that the questions and activities you will encounter provide you with the practice and feedback you need to successfully complete this course. You should complete all questions and place your responses in your course folder. Your teacher may wish to view your work to check on your progress and to see if you need help.
1.1. Launch
Module 6: Measurement
Launch
Do you have the background knowledge and skills you need to complete this lesson successfully? Launch will help you find out.
Before beginning this lesson you should be able to
- use a vernier caliper to obtain a measurement
- use a micrometre to obtain a measurement
1.2. Are You Ready?
Module 6: Measurement
Are You Ready?
Complete the following activity and answer the questions. If you experience difficulty and need help, work through Refresher or contact your teacher.
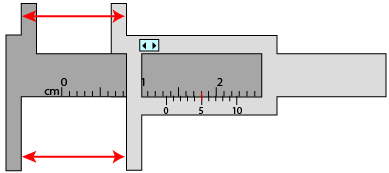
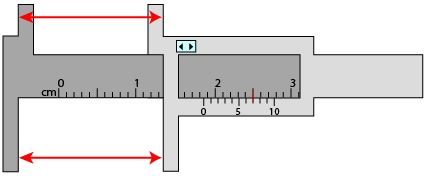
Reading a Vernier Caliper

© Kadmy/17325839/Fotolia
Recall from a previous math course that a vernier caliper is a measuring device that can be used to measure small linear distances.
Read the following measures and note the correct measure for each. If you have trouble reading the correct measure, skip ahead to Refresher.
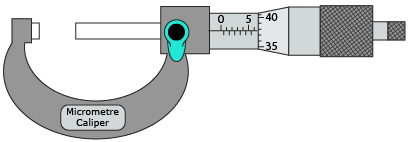
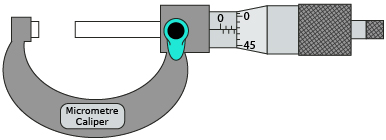
Reading a Micrometre
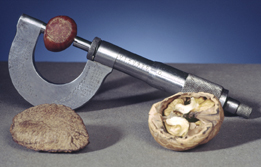
iStockphoto/Thinkstock
Another measuring devise you should be familiar with is a micrometre.
Read the following measures and note the correct measure for each. If you have trouble reading the correct measure, skip ahead to Refresher.
If you answered the Are You Ready? questions without difficulty, move to Discover.
If you found the Are You Ready? questions difficult, complete Refresher.
1.3. Refresher
Module 6: Measurement
Refresher
Reading a Vernier Caliper
Open the Vernier Caliper interactive to review reading a measurement using a vernier caliper. (You only need to be familiar with a metric vernier caliper). Slide the jaws of the caliper back and forth, stop, and test yourself on reading the measurement of the opening.
Reading a Micrometre
Open the Micrometre interactive to determine if you can read a measurement correctly using a micrometre. Spin the thimble of the micrometre back and forth, stop, and test yourself on reading the measurement of the opening.
Go back to the Are You Ready? section and try the questions again. If you are still having difficulty, contact your teacher.
1.4. Discover
Module 6: Measurement
Discover
In the Focus section, the importance of avoiding measurement errors was emphasized so that you could avoid costly mistakes. In Try This 1 you will practise some of your measurement skills with a variety of measurement tools.
Try This 1
Open Measurement and choose an object to measure.
Measure at least three objects with each of the measurement tools. Summarize your findings in a table similar to the following. Highlight the best measuring device for each object and the measurement found.

If you are having trouble using the Measurement interactive, follow the instructions provided in How To Use the Measurement Interactive.
Measurement Tool |
Object |
Measurement |
Metre Stick |
|
|
|
|
|
|
|
|
30-cm Ruler |
|
|
|
|
|
|
|
|
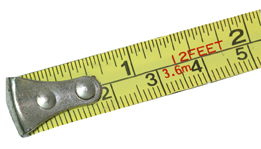
30-cm Tape Measure |
|
|
|
|
|
|
|
|
Vernier Caliper |
|
|
|
|
|
|
|
|
Micrometre |
|
|
|
|
|
|
|
![]() Save your responses in your course folder.
Save your responses in your course folder.
Share 1
With a partner or in a group, discuss what objects you measured and what measurement tools you used from Try This 1. Then answer the following questions.
- When is a smaller scale division more appropriate?
- When is a larger scale division more appropriate?
- Which device(s) would you choose to use to measure the length of a hallway?
- Which device(s) would you choose to use to measure the diameter of a pencil?
- When would it be more appropriate to use the vernier caliper rather than a tape measure?
![]() If required, place a summary of your discussion in your course folder.
If required, place a summary of your discussion in your course folder.
1.5. Explore
Module 6: Measurement
Explore
accuracy: how close a measured value is to the true value
Source: MathWorks 12 Student Book/Teacher Guide. (Vancouver: Pacific Educational Press, 2011.)
In Try This 1 you worked with a variety of measurement tools and a variety of objects to measure. You may have discovered that some measurement tools are better suited for measuring large objects when accuracy may not be as important. However, others are better suited for measuring small objects where greater accuracy may be needed.
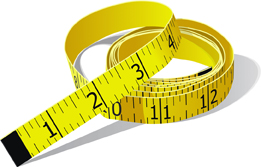
Suppose you measure the length of a wall using the length of your foot as a referent. As you can imagine, this method of measurement is not very accurate for a number of reasons. For example, you might not walk in a straight line, or your feet might not touch the same way each time, which would leave ample room for error. Instead, if a measuring tape is used, the length of the measurement will be more accurate, since it is a single measurement along a straight line.
It is important to recognize and choose the correct measuring device that is best suited for the required accuracy of a measuring task.
Self-Check 1
Order the following clocks from the least accurate time keeper to the most accurate time keeper. Explain your choice.
- alarm clock

Martin Poole/Photodisc/Thinkstock
- hourglass
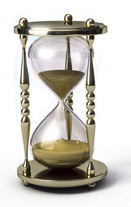
iStockphoto/Thinkstock
- rusty clock
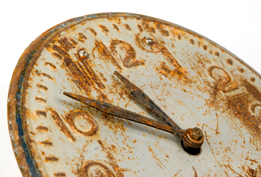
Hemera/Thinkstock
1.6. Explore 2
Module 6: Measurement
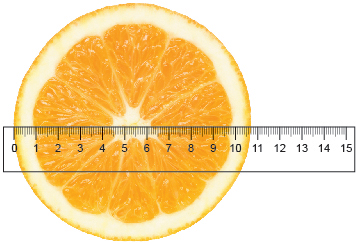
All measurements are considered approximate. The choice of a measuring device with small divisions is important in determining a precise measurement. For example, if you measure the diameter of an orange with a ruler stick that has divisions of 1 cm and your measurement is closer to 11 cm than it is to 10 cm or 12 cm, you would say the diameter of the orange is 11 cm.

iStockphoto/Thinkstock
If you measure the diameter of the same orange using a ruler with divisions of 1 mm, the result might be 10.8 cm. If you used a measuring device with even smaller divisions, your measurement would be more precise.
iStockphoto/Thinkstock
1.7. Explore 3
Module 6: Measurement
iStockphoto/Thinkstock
The more precise a measurement is, the easier it is to accurately reproduce the measurement.
precision: the smallest measurement on the measuring device being used
Source: MathWorks 12 Student Book/Teacher Guide.
(Vancouver: Pacific Educational Press, 2011.)
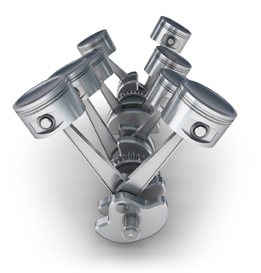
Choosing the right device in measuring length is important. When marking the length of a football field, a device with a precision of 0.1 cm is not needed—a field that is off by millimetres is unlikely to affect the outcome of a game. When measuring the outside diameter of a crankshaft in an engine, a device with a precision of 0.01 cm or smaller should be used, because the crankshaft will need to fit tightly with other engine parts.
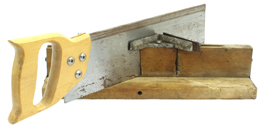
© Bert Folsom/17461115/Fotolia
This jig is used to cut the end of a board to a 45° angle.
When doing repetitive work, carpenters will often set up a jig. A jig is a good tool to use to cut the same measurement many times and ensure the same amount of accuracy. A jig is an invaluable tool, which you may be able to create yourself. For example, panel cutting jigs ensure that a panel is cut square to the bottom edge of the board. Circle cutting jigs allow you to cut perfect circles out of stock. Tapering jigs let you cut tapered legs on a table saw.
Self-Check 2
State the precision of each of the following measurements: ![]()
Measurement Tool |
Measurement |
Precision |
Metric Ruler |
23.6 cm |
____ cm |
Graduated Cylinder |
73 mL |
____ mL |
Micrometre |
6.91 mm |
____ mm |
Yardstick |
31.6 in |
____ in |
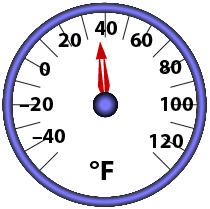
Thermometer |
25.7°C |
____°C |
Stopwatch |
13.47 s |
____ s |
1.8. Explore 4
Module 6: Measurement
To find the precision of the measurements in Self-Check 2, you had to assume the measurements you were given were the most accurate you could obtain using that particular measuring instrument. In Self-Check 3 you will be able to determine the accuracy by observing the actual measurement tool.
Self-Check 3
State the precision of each of the following measurement tools.
1.9. Explore 5
Module 6: Measurement
calibrate: to test, correct, or standardize a measuring instrument by comparing it to a known accurate standard
Source: MathWorks 12 Student Book/Teacher Guide. (Vancouver: Pacific Educational Press, 2011.)
In the last two Self-Checks you noticed that different measuring devices have different precision. Often what is being measured determines which device will be used and the degree of precision required.
So far, you have learned that there are two important considerations when measuring an object—accuracy and precision. You will learn about another important consideration, calibration, in the next Try This.

Noel Hendrickson/Digital Vision/Thinkstock
Try This 2
- To ensure the accuracy of fuel volume, gas pumps are calibrated. You may have noticed during a recent visit to a gas station that the fuel pumps are calibrated at 15°C? What does this mean?
- What might occur if a fuel pump goes through a long period of time without proper calibration?
- How would changes in temperature affect the accuracy of one litre of gas?
- The precision of a gas pump is 0.001 L. Explain why this number is so small.
![]() Save your responses in your course folder.
Save your responses in your course folder.
Share 2
With a partner or in a group, share your answers from Try This 2 and answer the following questions.
- Some road signs indicate distances using a precision of 1 km. In larger cities some road signs use a precision of 0.1 km. Explain why this is the case.
- When might road signs be inaccurate? How often should they be updated?
- Can you think of other examples of precision and accuracy in everyday life?
![]() If required, place a summary of your discussion in your course folder.
If required, place a summary of your discussion in your course folder.
1.10. Explore 6
Module 6: Measurement
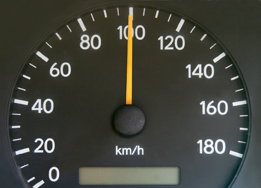
From Share 2 you may have noticed that the degree of accuracy and precision required can vary depending on how important it is to get the best measurement. When cooking, you may need to know the inner temperature of the poultry to a level of accuracy and precision that ensures you have killed the bacteria in the poultry. If you are getting ready to go outside, you only need the temperature accurately enough to tell whether you need to wear a coat or put on your shorts.
Self-Check 4
Use the photograph of the thermometer to answer the following questions.
Add the following terms to your copy of Glossary Terms:
- accuracy
- precision
- calibrate
1.11. Connect
Module 6: Measurement
Complete the Lesson 1 Assignment that you saved in your course folder at the beginning of the lesson. Show work to support your answers.
![]() Save your responses in your course folder.
Save your responses in your course folder.
Project Connection
Jupiterimages/Comstock/Thinkstock
You are ready to start working on Module 6 Project: Project Measurement. Go to the Module 6 Project and read over all project requirements. Become familiar with what you will be doing and how you will be assessed.
Your Module 6 Project will be evaluated by your teacher using the evaluation guidelines in the Project Rubric. Read the rubric carefully. Make sure you are aware how you will be assessed. You are also required to complete a self-assessment of your project using the project rubric. You can print or save a digital copy of the rubric.
Go to Module 6 Project: Project Measurement and complete Part 1: Start to plan.
![]() Save your work in your course folder.
Save your work in your course folder.
1.12. Lesson 1 Summary
Module 6: Measurement
Lesson 1 Summary
Comstock/Thinkstock
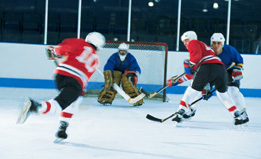
In this lesson you looked at examples of where accuracy and precision are found. In order to be accurate in a measurement, a certain degree of precision is required.
A real-life example: While playing hockey, a player always hits the right goal post 8 out of 10 shots. The hockey player is precise, but not accurate, since she or he wants to be inside the goal post in order to score a goal.