Project 2
| Site: | MoodleHUB.ca 🍁 |
| Course: | INF2020 |
| Book: | Project 2 |
| Printed by: | Guest user |
| Date: | Monday, 3 November 2025, 5:21 PM |
Description
Created by IMSreader
1. Project 2
Project 2: Learning the Numeric Keypad
In this project you will be introduced to the numeric keys on the numeric keypad. You will learn their reaches, and you will practise the correct finger position and movement on the numeric keypad. When you are familiar with the keys and reaches, you will then take time to practise what you have learned. When you feel ready, you will perform some timed writings with your teacher. You and your teacher will then compare your results with the performance standards. Your teacher will give you guidance, help you determine your speed and accuracy, and give you feedback on your typing technique.
Project Assessment(s)
In this project you will be assessed in these areas:
- touch typing skills—completing a number of exercises and one-minute timed writing tests
- touch typing technique—addressed through workstation routines and the completion of a technique assessment
- basic competencies developed in your learning of the alphanumeric keypad and the numeric keypad
Skill Level
In Keyboarding your goal is to touch type at a speed of between 100–150 keys per minute (kpm) on the keypad with no more than one uncorrected error. The length of timings for this section will be one minute. Check the assessment documents to see where your skill level falls.
Estimated Required Time
To properly develop your touch typing skills on the numeric keypad, you should commit to daily learning and memorization of the keys. You may need to spend some time practising the key locations and doing practise timed tests until you feel confident that your skill level matches the assessment requirements of this course. Most of the time spent in this course will be practising. This project will take you somewhere between six and nine hours, which includes covering course material, practising, completing exercises and self-checks, and communicating with your teacher.
Environmental Impact
To save electricity, turn off your computer and anything else on your workstation when you are finished practising.
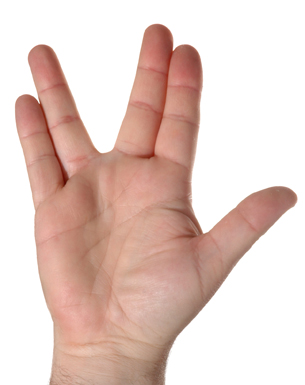
1.1. Page 2
Project 2: Learning the Numeric Keypad

© Ryan McVay/Photodisc/Getty Images
Imagine yourself as the boss or the owner of a company. What basic skills would you look for in your employees? What are the characteristics of a valuable employee? Workplace skills and attributes are called Basic Competencies in Career and Technology Studies.
Practising and refining your basic competency skills on a daily basis will help you be more productive and successful in every task you undertake, whether at school, at work, or in your personal life. Basic competencies are the soft skills employers value in their employees, what group members value in their peers, and skills that give you a sense of pride and satisfaction in your work.
soft skill: a person’s personality, social refinement, language skills, or personal and/or work habits that contributes to efficient and successful productivity
All people, to some degree, have basic competency skills. Existing skills can improve with time and experience, and you can always learn new skills that improve soft skills. People who are successful often possess a variety of soft skills in the workplace. It has been argued that the mastery of basic competency skills contributes to the degree of success individuals attain.
Perform the following steps:
Step 1: With a partner, in a small group, or on a discussion board, brainstorm a list of vital skills that relate to being successful. From the list you create, determine which skills are necessary for a variety of areas, like school (secondary or post-secondary), on the job, or in your personal life. You can document your list in a new word processing document on your computer. Be sure to save your list as Basic Competencies in your INF2020 folder.
Step 2: The following is a list of basic competencies deemed necessary for this course and other CTS courses:
- Fundamental Skills
– communicating
– managing information
– using numbers
– thinking and problem solving
- Personal Management Skills
– demonstrating positive attitudes and behaviours
– being responsible
– being adaptable
– learning continuously
– working safely
- Teamwork Skills
– working with others
– participating in projects and tasks
Compare your list to the basic competencies listed in Step 1; then answer the questions that follow in your Basic Competencies document.
- Are there any skills under Fundamental, Personal Management, or Teamwork that you didn’t mention in your list?
- Did you think of any skills that were not covered in the three groups listed above?
Step 3: Print a copy of the Basic Competencies Rubric. Complete a pre-course self-evaluation on your basic competency skills.
Step 4: Below the list you created in Step 1, write a short paragraph about a time in your life when you demonstrated basic competencies. Include work, school, or personal life experiences in your paragraph. It would be beneficial to discuss how the competency you identified impacted the example you provided. Save the changes to your Basic Competencies document.
Step 5: Choose one or two competency areas in which you can make improvements. Write an action statement of how you plan to practise the identified competencies. Identify the benefits of practising the competencies. Here is one example:
Basic Competency: Manage Information
Action Plan: Create and use suitable file names and organize files in appropriate folders.
Benefits: I save time when I can easily find my documents. |
Save the changes to your Basic Competencies document.
Checking Your Work
Use the Basic Competencies Rubric as a self-check to ensure that you are routinely thinking about using the basic competencies as you work.
Now you are ready to learn the numeric keypad. Good luck!
1.2. Page 3
Project 2: Learning the Numeric Keypad
Numeric Keypad
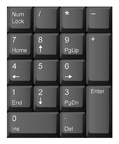
Now that you have learned the alphanumeric keypad, it's time to learn the numeric keypad. You must press the Number Lock (Num Lock) key on the keypad in order to be able to type the numbers.
Your goal in this project is to reach a speed of between 100–150 keystrokes per minute (kpm) on the numeric keypad with only one uncorrected error.
The numeric keypad is controlled entirely with your right hand. You will deal with one- to four-digit numbers in Keyboarding.
Home Row on the Numeric Keypad
The numeric keypad has a home row, just as the alpha keypad does. The numbers 4, 5, and 6 form the home row. Place your right index finger (J finger) on the 4 key, your right middle finger (K finger) on the 5 key, and your right ring finger (L finger) on the 6 key. Note the little raised dot or line on the 5 key. It helps you find the home row without looking at the keypad if you lose your place while typing numbers.
The Other Keys on the Numeric Keypad

The Enter Key
To enter the number you typed, make a downward natural reach with your little finger (semi finger) to the enter key.

The Addition (+) Key
The addition key is in line with home row, and your little finger is in a natural position to strike the addition key.

The 7 Key
The number 7 is typed by making an upward reach to the top row of number keys with your right index finger (J finger).

The 8 Key
The number 8 is typed by making an upward reach to the top row of number keys with your right middle finger (K finger).

The 9 Key
The number 9 is typed by making an upward reach to the top row of number keys with your right ring finger (L finger).

The 1 Key
The number 1 is typed by making a downward reach to the bottom row of number keys with your right index finger (J finger).

The 2 Key
The number 2 is typed by making a downward reach to the bottom row of number keys with your right middle finger (K finger).

The 3 Key
The number 3 is typed by making a downward reach to the bottom row of number keys with your right ring finger (L finger).

The 0 Key
The 0 (zero) key is pressed with your right thumb, which is in a natural position for this key. This is the only key—other than the space bar on the alpha keypad—your thumb controls.
Use the numeric keypad on your keyboard. If the keys on the numeric keypad are not working, press the number lock (Num Lock) key. Space once in between groups of numbers, and hit the Enter key at the end of the line.
- 45 95 5 56
54 596 55
584 44 847
545 854 654
867 56 968 
5 587 6
415 8 524 
7 535 9
531 78 2
89 312 98

The Decimal (.) Key
The decimal key is struck with your right ring finger (L finger). Anchor on the 4 or the 5 key and make a natural downward reach.

The Multiplication (*) Key
To use the multiplication function, make an extended reach straight up to the top row with your right ring finger.

The Subtraction (-) Key
To strike the subtraction key, move your right little finger straight up to the first row above home row.

The Division (/) Key
To strike the division key, extend your right middle finger to the top row of the keypad.
The Equal Sign (=) Key
The equal sign key is found on the alphanumeric keypad and is struck with the pinky finger on your right hand, making an extended upward reach to the top row of the keypad.
Remember that the little raised line or dot on the 5 key is your guide to the home row. Press the Enter key at the end of each line (pressing the Enter key counts as one keystroke). Your finished typing should look exactly like the original. The keystrokes per minute are provided if you wish to complete this as a timed practice test.
45*64=
54/6=
171-289=
354*0=
982/86=
404-3=
805/7=
201*4+8=
878-565=
23+547-88=
256/34*1=
280*739-4=             
Keystrokes per Minute
7
13
22
29
37
44
51
60
6
80
90
101
1.3. Page 4
Project 2: Learning the Numeric Keypad
Time to Work
This project should take you anywhere between six and nine hours to complete. Remember, work at your own pace, take frequent breaks, and refer to the toolkit and training sessions for review. Most of this project will be time spent practising keystrokes on the numeric keypad.
You have all the information you need to be on your way to becoming proficient on the numeric keypad. Now you need to practise. As with the alphanumeric keypad, you must memorize the key locations and the reaches and you must practise. Each time you work on Keyboarding, set aside some time to practise the keys on both the alphanumeric and numeric keypads. When you feel that you are ready to be evaluated, communicate that to your teacher.
Complete the exercises in Project 2 Exercises.
Checking Your Work
Print a copy of the Project 2 Assessment document and have your teacher sign off on completed assignments and exercises.
Finishing Up
Clean up your workstation when you are done, and shut down your computer and all other hardware to save on electricity.
1.4. Training Room 2
Project 2: Learning the Numeric Keypad
Training Room 2: Developing Speed and Accuracy
© zerra/shutterstock
Estimated Required Time
This training session will take you approximately 30 minutes.
How to Do It
The speed at which you type comes with practice—and lots of it. In this session you will learn some tips that will help you develop your touch typing speed.
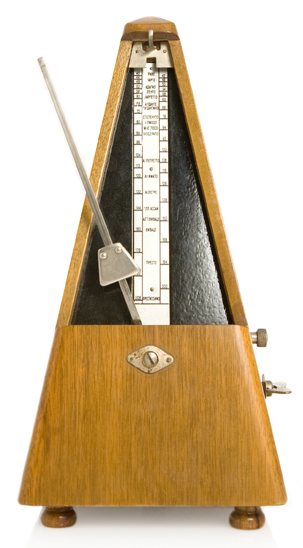
Pacing
It’s good to type with a rhythm when learning how to type. Some people find that using a metronome helps keep them in rhythm. Teachers will often pace students through beginning exercises to help them establish a rhythm. If you are working alone, you can maintain a rhythm by pacing yourself. Say each letter to yourself as you strike it, keeping a definite rhythm or timing.
- For example, consider the following phrase.
- The lake is calm.
- If you were typing this phrase, you might choose to type with the following rhythm, where you stress the first character of each set of two characters
- Th  e[space]  la  ke  [space]i  s[space]  ca  lm
Rhythm helps improve accuracy.
1.5. Page 2
Project 2: Learning the Numeric Keypad
Exercises to Increase Speed
If you are a beginning typist, you may find that some of your fingers are not as strong as others. For example, it is common for a beginning typist to strike the S key instead of the A key because the little finger is not used as often in daily activities and does not have the strength that other fingers have.
By moving your fingers and tapping them as if you were typing in random order, you will strengthen all of your fingers. This will also allow your fingers to move faster.
Many proficient (fast) typists say that when they were learning to type, they would envision the keys in their mind and pretend they were typing words by just moving their fingers in the air. (This is a good exercise for accuracy also.)
Following are several other activities to strengthen your fingers and hands.

© 2009 Jupiterimages Corporation
Fingertip Curl
Slowly bend the finger tips of both hands inward without closing them into a fist. Your fingertips should touch the palm of your hand. Hold this position for a few seconds; then slowly straighten your fingers to relax the muscles. After a few seconds, bend your fingers again. Do this several times.

© Helder Almeida/shutterstock
Five-Finger Stretch
Extend the fingers of both hands, and spread them as far as possible. Hold this position for several seconds; then relax your fingers, allowing them to curl lightly into the palm of your hand. Repeat these movements slowly several times.
open hand: © Helder Almeida/shutterstock
fist: © Tatiana Popova/shutterstock
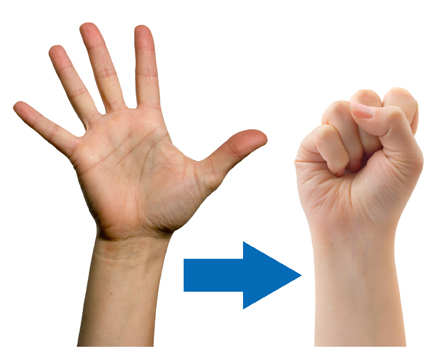
Fist Clench
Extend the fingers of both hands and spread them as far as possible. Hold this position for several seconds; then curl your fingers into a tight fist with your thumbs pressed firmly on the top. Squeeze your fists tightly for several seconds; then relax the muscles and slowly straighten the fingers. Repeat these movements several times.

© Vladimir Kozieiev/shutterstock
Interlocking Finger Squeeze
Interlace the fingers of both hands. Wring your hands back and forth while holding the heels of your palms firmly against each other. Do this for several seconds.
© Howard Sandler/shutterstock
Two-Finger Stretch
Hold your hands in front of you with your fingers extended and held close together. While holding the middle, ring, and little fingers together, move the index finger as far away from the others as possible. Hold this position for a few seconds; then allow your index finger to return to its position next to the middle finger. Then while holding the index and middle finger together, move them as far away as possible from the other two fingers. Hold this position for a few seconds; then allow your fingers to return to their normal position. Finally, move the little finger as far away as possible from the other three.
1.6. Page 3
Project 2: Learning the Numeric Keypad
Time to Practise
Take some time in between practise sessions to practise these exercises. Complete the exercises in order to develop strength and flexibility in your fingers so they are able to make the reaches quickly.
Checking In
On your word processor, complete the timed writings that follow. You will need a friend or family member to supervise your timed writing attempt. Your goal is between 30–50 wpm on the alphanumeric timings, and between 100–150 kpm on the numeric timings. You are allowed to use the backspace key to correct errors while being timed. Do not correct any errors after the time allowed is up. You may repeat the timed writing as many times as it takes to reach the required speed and accuracy goals.
Open Time to Practise 2 and print the timed writings. You will also need your Project 2 Assessment document.
Have someone (preferably a touch typist) watch you while you type. Refer to Technique Evaluation as you will be evaluated according to this rubric.
Discuss with your teacher whether you are ready for the final exercise for the course. The final exercise consists of six timed writings and is designed to test you interactively.
The design of the six timed exercises is the same as your final test. The final exercise will time you, determine your speed and accuracy, and allow you to determine your readiness to attempt the final test.
Make sure you revisit any of the documents for more practice exercises or to review tips and techniques. Revisit the rubrics for reminders of how you will be assessed by your teacher.
When you are ready to attempt the Final Project, let your teacher know.
1.7. Project 2 Summary
Project 2: Learning the Numeric Keypad
Project 2 Summary
Upon completion of your practice timed writings and the calculation of your keystrokes per minute, you will be able to check the assessment guide and see whether you have met the competencies for the numeric keypad. Check with your teacher for feedback on your workstation routines and your typing technique. Make sure you are always sitting properly and your workstation is neatly organized.
Communicate with your teacher about your progress and results of this project.