Training Room 1
| Site: | MoodleHUB.ca 🍁 |
| Course: | INF2050 |
| Book: | Training Room 1 |
| Printed by: | Guest user |
| Date: | Friday, 26 December 2025, 9:51 AM |
Description
Created by IMSreader
1. Training Room 1
Project 3: Documents for Personal and Business Use
Training Room 1: Introduction to Microsoft® Word® 2007

© Yuri Arcurs/shutterstock
In INF1030: Word Processing 1 you discovered the advantages of having basic word-processing skills. You have probably used those skills to do your school assignments, write letters and reports, create posters with graphics, and maybe even to create a table for your science lab results. By now, you may have realized the benefit of developing more advanced word-processing skills to make document production faster and easier, and to make your documents more professional-looking. The more you work with Microsoft Word, the more features you will learn. You will start to notice all of the practical uses of these features in your personal life, at school, and as you start preparing for your future career.
This course is an intermediate-level course that will lead you towards becoming certified in Microsoft® Word®. When you complete INF2050: Word Processing 2 and INF3060: Word Processing 3, you will have learned and practised the skills required to become a Microsoft® Word® Certified Application Specialist, a highly distinguished and well-known designation in all industries and corporations.
Ensure that you work carefully through the training rooms and let your teacher know if you need help. You can repeat the training rooms until you are comfortable with the skills being taught. If you have experience with word-processing software, a review can help you discover alternative ways to perform tasks and teach you shortcuts that will speed up your work.
In this training room you will
- learn important features of Microsoft® Word® 2007
- learn how to set up new documents
- learn how to organize files to make them easier to find
- learn how to quickly access commands with the mouse and the keyboard
- see how to reveal hidden codes when reviewing documents
- learn how to make your documents compatible with different software
- set personal goals to achieve success in this course
- read and watch demonstrations to discover some the features of Microsoft® Word® 2007 that you will use in the course
- practise the software-specific skills necessary to demonstrate your understanding for this course
- use help and online references should you require additional instruction or software assistance
- complete the practice activities and self-check your work
- save activities in your INF2050: WP2: Intro folder
1.1. Page 2
Project 3: Documents for Personal and Business Use
Key Features of Microsoft® Word® 2007
Work through “Key Features of Word 2007” to see how the user interface has changed and to learn about some of the new features.
Go to the Instructional Videos and choose “The Screen of Microsoft Office 2007” to see how to use Microsoft Word 2007 screen features.

© Slash331/shutterstock
Using Help Functions and Online References
Resourceful, adaptable, life-long learners know where to look for information. There are several ways to find information and teach yourself how to use your word-processing software:
- Use the built-in and online Help functions.
- Access online resources and demonstrations on the Internet.
- Join an online learning community.
Go to the Instructional Videos and watch “Getting Help” to see how to access help for Microsoft® Word® 2007.
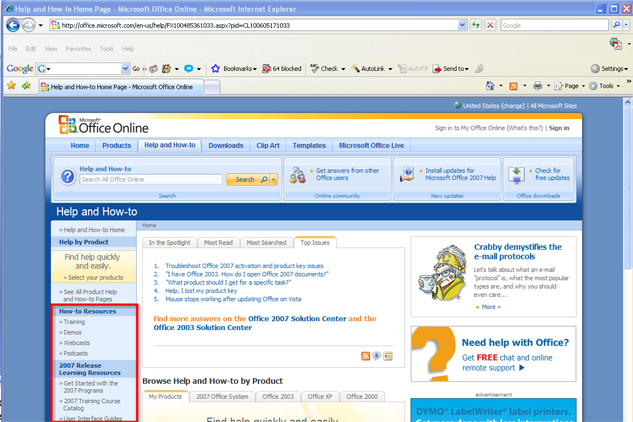
Microsoft® has developed a variety of how-to resources to support the users of Microsoft® products. Microsoft® Office® Online can be a wealth of information. From there, you can access training, demonstrations, webcasts, podcasts, and information on how to become Microsoft® Office® Certified. Visit Microsoft® Online to refresh your memory or to learn a new skill.
Microsoft product screen shot(s) reprinted with permission from Microsoft Corporation.
1.2. Page 3
Project 3: Documents for Personal and Business Use
Setting Up New Documents
To change your document measurement from centimeters to inches (metric to imperial), click the Office button and choose Word Options, Advanced, Display.
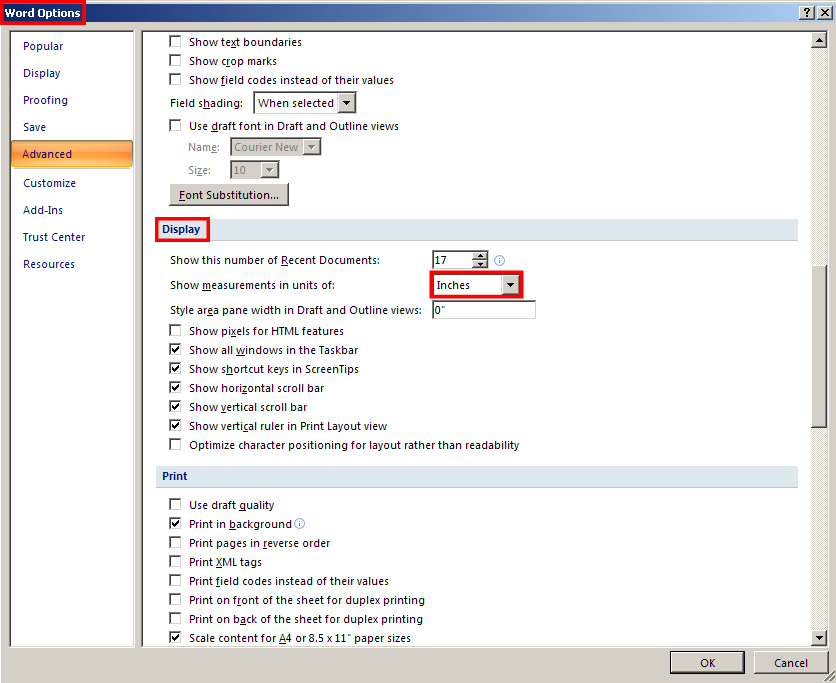
Microsoft product screen shot(s) reprinted with permission from Microsoft Corporation.
When you start a new document, it is important to set up the page according to your preferences or the demands of the document type. For example, a letter will look much different from a full-colour newsletter. Go to the Instructional Videos and watch “Settings in a New Document” to learn how to set up a new document.
Organize and Identify Files
Use the Document Properties feature in Microsoft® Word® 2007 to organize and identify your work. The Document Properties feature stores important data about a document, such as its title and author or keywords that identify its subject or content. This kind of data is called metadata, which essentially means data about data.
Go to the Instructional Videos and watch “Document Properties” to learn how to set standard document properties, or metadata, for your documents.
Go to the Instructional Videos and watch “Using Document Properties” to learn how to view document properties as you open a file.
Quick Clicks and Keystrokes
Microsoft® Word® offers many ways to access software commands and features. Learning keyboard shortcut keys—such as Ctrl + S for Save and Ctrl + P for Print—will speed up production and improve ergonomics by reducing your hands’ movements from keyboard to mouse. You can find keyboard shortcuts in the ScreenTip that appears as you hover over command buttons. Make it a habit to take note of keyboard shortcuts and use them whenever you can.
Another way to quickly access software commands is by using the right mouse button. In Microsoft® Word® 2007, when you select text and click the right mouse button (‚Äúright-click‚Äù), a menu of formatting commands appears.
Some commonly used commands that you can access by right-clicking the mouse are Cut, Copy, and Paste. Go to the Instructional Videos and watch “Copy and Paste” to see how the mouse is used to copy and paste text and to learn how the clipboard stores items for pasting.

Microsoft product screen shot(s) reprinted with permission from Microsoft Corporation.
For easier editing and review, you can view a document's hidden formatting codes. Go to the Instructional Videos and watch “The Show/Hide Tool” to see how the Show/Hide button reveals non-printing paragraph marks and other hidden formatting symbols. In Training Room 5: Reports, you will learn how to use the Reveal Formatting command to see even more detailed source code.
1.3. Page 4
Project 3: Documents for Personal and Business Use
Compatibility with Other Software
You can save your documents in different file formats to make them compatible with earlier versions of Microsoft® Word® or other software programs, or even to convert them to web pages. You can also save documents in PDF (portable document file) format to preserve the data and the formatting of a document for publishing.
Go to the Instructional Videos and watch “Saving in Different Formats” to learn how to convert files to different formats.
Security Tools

Microsoft product screen shot(s) reprinted with permission from Microsoft Corporation.
When you are happy with the final draft of your document, you can make your file “read-only” to prevent changes to the document. Click on the Office button, choose Prepare, and select Mark as Final. To edit a document that has been marked as final, you will need to repeat the process but this time to unmark the file.
Labelling Your Work
It is important that your assignments are labelled if you intend to print your work. Go to the Instructional Videos and watch “Headers and Footers” to learn how to use the header or footer to insert your name, assignment name, and the date into your documents.
1.4. Time to Practice 1
Training Room 1: Introduction to Microsoft Word 2007
Time to Practise
Practice 1
There are many different life roles and career pathways that relate to the knowledge and skills you will learn in this course. Take a minute to think about the opportunities in all aspects of your life to use these technological skills. Thinking about how you may actually use your skills will help you see the value and benefits of developing and advancing these skills.
Step 1: Start a new document.
Step 2: Save the file as “Skills” in your INF2050: WP 2: Intro folder.
Step 3: Set the orientation to Landscape, and the margins to “1” top and bottom and “1.25” left and right.
Step 4: Answer the following questions in your “Skills” document:
- How do you see yourself using word-processing skills for school? In your personal life? In the work force?
- Explain at least two benefits of developing word-processing skills.
- Are there any barriers in your learning environment that hinder your ability to develop your skills? (Equipment, software, work environment?)
- What resources are available to you to help you maximize your opportunities and minimize your barriers?
- What personal skills do you have that enabled you to succeed in this course? Be specific.
Step 5: Use the Show/Hide button to reveal hidden formatting codes.
Step 6: Make any necessary editing and formatting changes to make your document visually appealing.
Step 7: Include your name and the date in the footer of your document.
Step 8: Use the Microsoft button. Select Prepare Properties, and fill in the following information:
- Author: Your Name
- Title: Goals
- Subject: INF2050
- Choose a Keyword
- Status: Draft
Step 9: Save a copy of your document to be compatible with Word 97–2003. Name the file “Skills 2.”
Practice 2
In this “Screen Drag-and Drop,” drag the labels to the correct location on the screen.
Ready?
You will use the features and skills taught in this training room throughout this course. Use the following questions to determine if you understand the concepts presented and are ready to move on in the course.
- Can you identify the parts of your word-processing screen?
- Can you set the paper size, page orientation, and the margins of your document?
- Can you access and change standard document properties to organize your files?
- Can you access software commands and features by using buttons and shortcuts and by right-clicking?
- Can you use Show/Hide to reveal a document’s hidden formatting codes?
- Can you save documents to be compatible with other software and versions of Word?
If you answered “Yes” to all of the questions above, you are ready move on to the next training room and start document production. If you answered ‚ÄúNo‚Äù to any of the questions, take a minute to repeat the relevant demonstrations until you are ready to proceed.
Check Point
Use the Software Skills Checklist and check off which skills you are confident in demonstrating.
Check with your teacher if you feel you need a more detailed follow-up tutorial or more instructions.
When you are comfortable with the concepts presented, you are ready to start document production. Repeat the training sessions until you are ready to proceed, or check with your teacher for follow-up tutorials or instructions.