Project Measurement
Process
Towards the end of each lesson, under Project Connection, you will be prompted to complete a part of the Module 6 Project. You can access the entire project from this page at any time.
Make sure to save all work from each Project Connection in your course folder. You will submit your Module 6 Project to your teacher at the end of Lesson 4. Check with your teacher about how you should submit your project work before you begin the project.
It is estimated that this project will take three hours in total to complete. To help you successfully manage the project and your time, you will be directed to parts of the project throughout the lessons as you learn the necessary concepts. You are encouraged to take the time to complete each part of the project as you complete the lessons.
Presentation
The most important part of your project presentation is clearly explaining and supporting your reasoning with relevant visuals and calculations. Make sure to show all your work.
Review the Project Rubric to ensure you understand how you will be assessed on this project.
The final presentation of your project will be in the format of a complete planning kit to make a chest of drawers.
Project Introduction
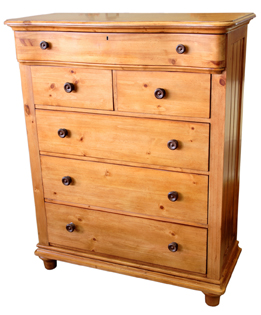
Hemera/Thinkstock
As you complete the project for this module, you will be applying your knowledge of accuracy, precision, uncertainty, and tolerance in measurement to designing an assembly kit for a chest of drawers.
Part 1: Start to plan.
Your company, HomeKits Inc., produces plans for home-woodworking furniture projects. A customer has asked you to produce the drawings to make a chest of drawers to match one that she already has. A chest of drawers has many separate pieces that must join together accurately. These include the frame, the drawers, the legs, and the assembly hardware, such as drawer pulls and screws. Metal components that make up the sliding mechanism of the drawers might also be present.
Look closely at the different types of wooden furniture around you. Can you see how the pieces are put together? Try to find examples of different types of joints, and think about their advantages and disadvantages.
- Where do the pieces need to fit together more closely?
- Are there places where the dimensions need not be as exact?
- Are there holes that need to line up with other pieces?
- Are there multiple pieces that should be the same?
- How closely should these similar pieces match?
As you examine various pieces of furniture, think about the function of each piece. How exact are the dimensions? How do the dimensions affect the final assembly of the furniture piece? 1
Record your observations based on the part 1 questions, and save them in your course folder as your Module 6 Project.
Part 2: Draw the pieces of your chest of drawers and measure the components.
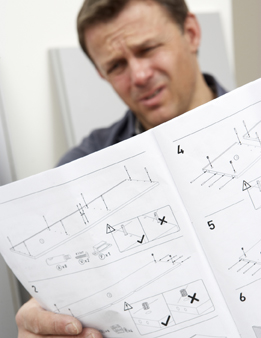
Monkey Business/Thinkstock
Find a chest of drawers or similar piece of furniture to work with. Assume this piece is identical to the one the customer has asked you to replicate.
- Look at your chest of drawers and make a detailed list of every piece. If there are several pieces (such as legs) or sub-assemblies (such as drawers) you need only do one set of measurements and drawings, noting on the parts list, and on the drawing, the number of pieces that are required.
- Make a rough sketch of each piece. Note how each piece must fit with other pieces to make a functional assembly.
- Make an assembly diagram of your chest of drawers. This will help you to decide which dimensions are more critical and require tighter control, and which can have a greater variation.
- Choose an appropriate measuring device to measure each piece. Be as accurate as possible, and measure to appropriate levels of precision. Include all the dimensions necessary to completely make the piece, including length, width, thickness, and the location of any details required to join the piece into its assembly.
- Mark the dimensions on the sketches that you made previously.
- Mark each dimension with its uncertainty. 2
Part 3: Apply tolerances to your component.
- Decide on appropriate tolerances for each of the dimensions on your drawings and label your drawings with these figures. Keep in mind that pieces to be joined together must match, joints should be mainly at right angles, drawers must fit into slides with enough room to move freely, and so on.
- Using your list of components, calculate the maximum and minimum value for each component dimension.
Project Checklist: Assemble the planning kit.
Working from a chest of drawers that you have at home, you will produce a complete planning kit to make the chest. Your kit should include the following:
- a photograph of the chest of drawers on which your kit is based
- a list of materials needed
- a list of components for your chest of drawers that includes the maximum and minimum values of each component’s dimension
- a drawing for each part of the chest, showing the dimensions, uncertainties, and appropriate tolerances necessary to build it
- an assembly drawing showing how the parts go together
- a brief description of the measuring devices that were used, including the precision of each 3
Part 4: Complete the project rubric.
Before finalizing your project, complete the project rubric self-assessment to make sure all components of the project have been addressed. In other words, what standard—excellent, proficient, adequate, or limited—would you place yourself in each of the categories? You can highlight, circle, or checkmark your selections.
Complete the following questions:
- What do I still need to learn? Where are my learning gaps?
- What is my action plan for closing the learning gaps? Who is my support?
- What is my time frame?
You have now completed the Module 6 Project. Submit your project with the completed rubric to your teacher for grading.
Project Assessment
Your Module 6 Project will be evaluated by your teacher using the evaluation guidelines in the project rubric. Read the rubric carefully. Make sure you are aware how you will be assessed. You can print or save a digital copy of the Project Rubric as a guide to help you complete your project.
Don’t forget to submit your completed Module 6 Project to your teacher at the end of Lesson 4.
1 – 3 Source: MathWorks 12 Student Book/Teacher Guide. (Vancouver: Pacific Educational Press, 2011.)