Training Room 2: Keeping Safe and Healthy—Standards and Practices in an Agricultural Environment
Session 3: Ladder Safety—Standards and Practices
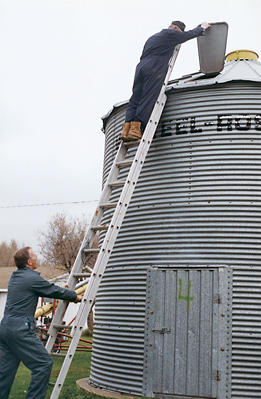
 Courtesy of Gordon Coulthart and The Canadian Agricultural Safety Association
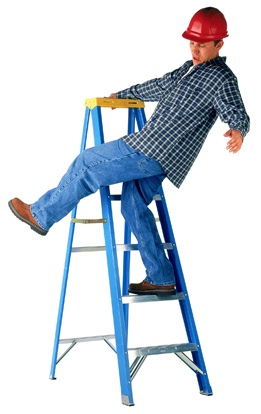
Improper use of ladders can lead to falls and serious injuries.The appropriate ladder must be used for specific jobs and safety precautions must be taken. Proper procedures for ladder maintenance, setup, and use also need to be followed to ensure worker safety.
Learning Target
In this session you will learn the standards and practices that will you keep you safe when using ladders on your agricultural worksite. Keep the following questions in mind as you work through the material:
- What is the best ladder you can choose to safely work in your agricultural environment?
- How can you try to ensure the safety of workers using ladders on your worksite?
Choosing the Right Ladder for the Job
Ladders enable agricultural workers to access structures, farm equipment, and materials needed for work, and allow them to perform jobs such as painting, loading, or harvesting.
 Courtesy of the MB Labour & Immigration – Workplace Safety & Health Division and The Canadian Agricultural Safety Association
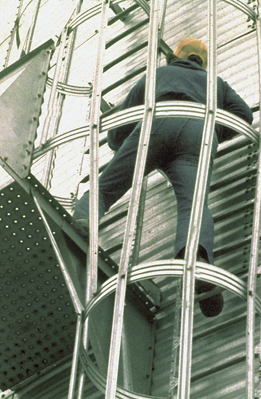 Courtesy of the University of Minnesota Extension and the Canadian Agricultural Safety Association
Permanently mounted ladders: In an agricultural environment, ladders can be fixed in place. They can be permanently mounted to large farm equipment, such as balers and grain carts, or built onto the sides of farm structures, such as silos and hay lofts.
Portable ladders: Portable ladders allow workers to perform jobs in various areas of the farm, such as work in and around buildings, in orchards when maintaining trees and harvesting fruit, and accessing trenches.
It is important to choose the correct ladder for the job and worker involved. Each ladder type is designed with a specific purpose in mind. The ladder type you choose to use depends on
- the height that needs to be reached (length of ladder)
- the work environment: what the ladder will be exposed to, e.g., a wood ladder is best when working near sources of electricity)
- the (even or uneven) surface that the ladder must stand on
- duty rating: the weight that the ladder must hold, including worker, clothing, and equipment)
- type of work
Inspecting and Setting Up the Ladder for Work
Checklist for Inspecting Ladder Before Use
- Check rails for cracks, checks, bends, or defects.
- Check for broken or missing rungs.
- Check the braces.
- If you are using a step ladder, make sure it is fully open and the spreaders are locked.
- Are the feet worn or broken?
- Is the base of the ladder placed on a solid surface?
- Look for anchor points at the top and bottom of the ladder.
- Look at where the top of the ladder is resting. What is above where you are working? Are there any hazards (e.g., overhead electrical wires)?
- Check for other work being performed near you.
- If the ladder has been repaired, make sure it has been restored to its original design specifications.
- Before moving a ladder, check for material or tools left on it.
From Ladder Safety (SafeManitoba)
Procedures for Setup and Placement of Ladder When Working
© SafeWork Manitoba
- Ladders should be placed so that each side rail is on level and firm footing so the ladder is rigid, stable, and secure.
- Boxes, loose bricks, or other loose packing should not support the side rails.
- No ladder should be placed in front of a door opening towards the ladder.
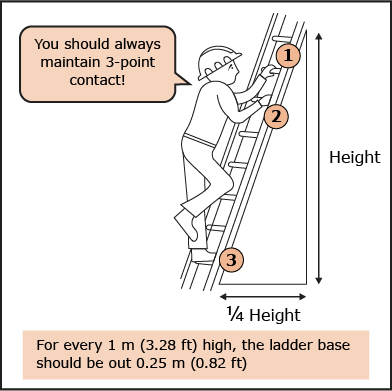
- The correct angle for a freestanding ladder is 4 to 1. For every 4 lengths up, the ladder should stand 1 length away from the house.
- Ladders should extend at least 3 feet or 1 metre above the top of the wall to be climbed.
- Ladders should be securely fixed at the top and base so they can't move from either point of rest. If this is not possible, a second person should stand at the base of the ladder and secure it manually.
Safely Using a Ladder
- Carry tools and supplies in belts or pouches around the waist, never in your hands.
- Don't use the top step of the ladder for standing or stepping.
- If you have a fear of heights, STOP. Don't climb a ladder; let someone else do it.
- Read and follow the manufacturer's warning stickers attached to the ladder. It is amazing how few people read this information.
- Only one person at a time may work from a single ladder.
- Always face the ladder when ascending or descending.
- Don't use a ladder if it is missing rungs or if it has a weakened, broken, or otherwise defective rung or tread.
- No metal ladder or ladder reinforced with wire should be used in the vicinity of any electrical conductor or any electrical equipment.
- Always maintain three points of contact with the ladder (two feet and one hand or two hands and one foot should be in contact with the ladder at all times).
- A ladder should not be used for any use other than its correct use as a ladder.
From Tips on Ladder Safety (Alberta Construction Safety)
Checking In
Discuss
Think about when you or a co-worker might use a ladder on your agricultural worksite.
- Choose a situation when you or a co-worker would use a ladder on your worksite.
- What are the most important procedures for proper inspection, care, and storage of ladders that you would need to put in place when using ladders in this situation?
- How will these procedures be used by you or your co-worker when using ladders in your workplace?
- Demonstrate your understanding of the procedures for proper inspection, care and storage of ladders to your worksite supervisor or teacher. Submit an Acknowledgement of Ladder Safety Demonstration form if you have demonstrated this on your worksite or other location.
- If you want to demonstrate your understanding of ladder safety in your Risk Management Tutorial Project, you can use the situation you considered above to help describe the standards and practices for ladder safety in your workplace.