Module 5
1. Module 5
1.3. Page 3
Module 5: Angles
Explore
In this activity you will develop referents for estimating the measure of an angle from 0° to 180°. You may recall that you used referents in Module 4 to estimate area in SI and in imperial units. Now you will prepare referents that divide the circle into smaller, useful sectors.
 Try This
If possible, work with a partner. You will each need scissors, a protractor, a compass, and a blank sheet of paper.
Step 1: Fold a blank sheet of paper in half from top to bottom. Then fold it in half again.
Step 2: Unfold the sheet of paper and draw lines along the creases. Then, draw a circle with a radius of at least 8 cm. The centre of the circle is the point where the lines cross.
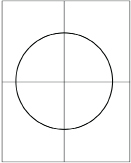
TT 3. With your measure, check to see that the angle between the two lines is 90°. Explain why the angle must be 90° in measure.
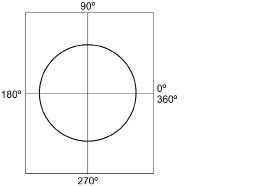
Step 3: Write the measures of the angles as you go once around the circle, as shown in the following graphic.
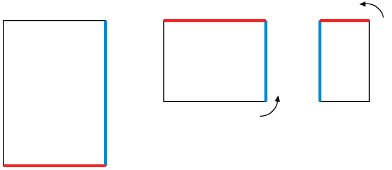
Step 4: Fold the paper as before. Then fold the paper at the centre to form a triangle. The folded edges shown at the bottom of the diagram must match. Then cut off the excess paper on the right (shaded pink) so that a square is created when you unfold the paper, as shown. Draw lines along the new creases.
TT 4. Without using a protractor, infer how large each of the eight angles is. In your answer, explain how you can use just the positions of the creases and lines to obtain a measure for each of the angles.
TT 5. Write the measures on each of the new angles as you did in Step 3.
Step 5: Fold your paper back into the triangle of Step 4.
Now, fold the triangle from Step 4 in half, as shown in the following diagram, to form the smaller triangle.
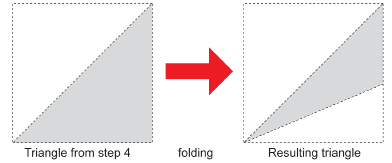
Now, unfold the paper. You should have 16 small angles formed at the centre of the paper.
TT 6. How large is each of the 16 small angles. Why?
TT 7. Write the measures on the new angles as before.
You have divided your circle into four, eight, and 16 angles, which you can use as benchmarks or referents to estimate the size of a given angle.
However, there is one more task for you to do. You will form 30-degree and 60-degree angles to also use as referents. These two angles will help to refine your estimates.
 Self-Check
Can a folding exercise be used to create the 30-degree and 60-degree referents?
If possible, work with a partner.
You will each need a square sheet of white paper, scissors, a protractor, and a compass.
Step 1: Fold the square sheet of paper in half. (See the following diagram.) Unfold the sheet. Then, fold the right half in toward the centre crease. Now, unfold the sheet to reveal the two creases.
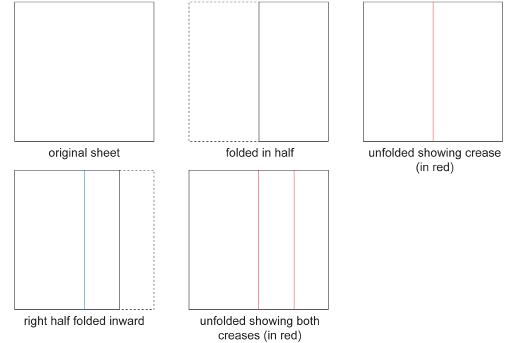
SC 1. What fraction of the entire sheet is each narrow vertical strip composed of? Why?
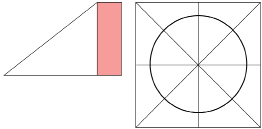
Step 2: Take corner C in the next diagram and place it on the right quarter line as shown. While holding the corner on that line, crease the paper so that the crease passes through the bottom endpoint of the centre line. Cut out the triangle (shown in green).
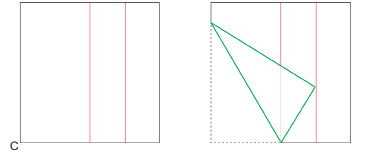
SC 2. Using your protractor, measure each angle of the triangle. How large is each angle? On each angle of the triangle, write its measure.
Sizing an Angle in the Folding
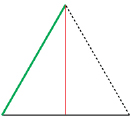
The reason one of the angles is 60° is because the small triangle in the bottom right corner is an equilateral triangle.
In any triangle the sum of the angles is 180°. In an equilateral triangle, a special triangle with three equal sides, the three angles are equal in size.
So, each of the three equal angles must be 60°. Why? Because 3 × 60° = 180°.